Monday, July 21, 2014

Oatmeal Applesauce Cookies... With Cream Cheese Frosting

A few weeks ago, my friends and I got together for some wine, gossip, and eating. I, as always, volunteered to bring dessert. I was then going though recipes to try on my Pinterest page (do you follow me, you should? I have a great eye for food that's delicious... and not always good for you). The Viking and I were discussing options, I wanted these apple sauce muffins I used to make as a kid and he asked for oatmeal cream pies... Vikes went into the kitchen to see if I needed any oatmeal, while I inventoried what I needed (apple sauce, obvs.) and informed me that I have two big containers of oatmeal. Each container is two pounds... I have FOUR POUNDS of dry oatmeal. WTF. How does that even happen? Clearly I need to cook with more oatmeal... because four pounds of oatmeal isn't going anywhere.

So, I combined a few recipes of apple sauce cookies and oatmeal cookies, then found a few apple sauce oatmeal cookies. None of the ones I tried turned out well, so I created my own. As always, you are welcome.

Here's what you'll need:
1/4 C of soften butter (1/2 a stick)
1 C of brown sugar
1/2 C of white sugar
1 egg
1/2 C of apple sauce (I like the old fashioned, well blended, smooth type)
2 1/4 C of flour
1 3/4 C of oatmeal
1/2 t of baking soda
1/4 t of baking powder
1/4 t of sea salt

Preheat your oven to 350 degrees. Line your cookie sheets with silicon, parchment paper, or spray it with some cooking spray (these guys are sticky!)

In a large bowl, cream your butter and both sugars together until smooth. Combine the rest of your wet ingredients (apple sauce and egg) until the batter is smooth. In the same bowl, add one cup of flour and one cup of oatmeal, and the rest of your dry ingredients (baking soda, baking powder, and sea salt). Mix until smooth. Mix in the rest of your flour and oatmeal, a little at a time, until everything is well blended.

Scoop out your batter (with a spoon or ice cream scoop) onto your lined cookie sheets. Keep them at least two inches apart - these guys have been known to spread out.

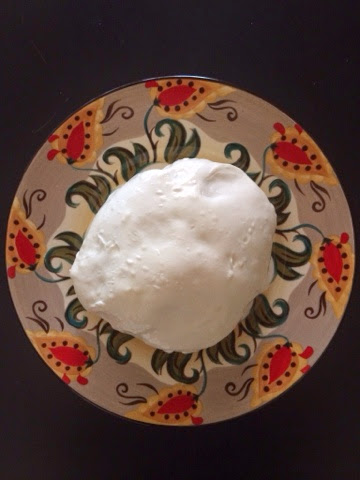
Bake for 14 - 16 minutes. Let cool (for 30 minutes) and frost! I recommend cream cheese frosting


Sunday, July 20, 2014

Cream Cheese Frosting Perfected


Generally on Sundays, I try to attempt a new recipe or two. The fruits of these labors are then brought to dinner with family or friends that night or to work the following day. When you bring homemade cookies to the office, it's hard to have a bad Monday. From there, I have been known to discuss how relaxing I find baking. The speech then goes into "two sticks of butter, a cup of sugar" and I rattle off cookie ingredients with a giant smile. (I'm fully able to admit I lurv creating things in my kitchen).

You know what goes great with cookies? Frosting. As many of  aware, cream cheese is the best frosting ever.  If you disagree, clearly you're a communist I suggest you try this delightful frosting. It's so easy and adds the perfect sweet tang that you didn't even realize you cookie needed. 


Here's what you'll need:
1 8oz block of Neufchâtel cheese
2 cups of powdered sugar
1 tsp of vanilla

Use a stand mixer or hand mixer, add you softened cheese and one cup of powdered sugar. Mix it on low (you don't want ALL the powdered sugar exploding). Once it's well blended, add the next cup of sugar and the vanilla. Blend and blend. It magically turns into a smooth shiny frosting. Yum! Feel free to add more powdered sugar if you like your frosting a little dryer. (I do mine by look and taste... Because I've apparently had a ton of practice).


Yep, that's it. If you haven't jumped on the Neufchâtel bandwagon, welcome to it. It's just like cream cheese in flavor, but it's made with milk, versus milk and cream - like cream cheese. Being that it is milk in the fermentation process (cause that's how cheese is made...), it had less fat that regular cream cheese. It's also a little more moist than cream cheese. It's fantastic. 

A little food coloring and a piping bag and you'll have the perfect cupcake frosting too! But this batch goes to some delightful cookies!
Frosted Cookies
                                         

Tuesday, July 15, 2014

Oh The Places You Will Work

If you're anything like me, and I suspect you are - you have a job. At this sometimes delightful place where you work, you probably work with other people, right? For those of you who are stay at home parents or work from home luckies, this doesn't really apply to you, but I suggest reading on. You never know when you'll find something entertaining or helpful (and I'm aiming for both!)

I work for an awesome company, in an absolutely beautiful office. With that being said, it is a small office of just a handful of people. We see each other for hours on end with, at times, minimal outside interaction.  Since we here at NattilyNatalie discuss fashion, fare, and FORM - let's go over a few handy tips to make your work life a little less frustrating... and maybe a little more fun!

Work Selfies Happen
Starting You Day
- Have you noticed some people park in the same spot everyday? Don't take their spot. Some people are very particular. There is always plenty of parking (or even company or city assigned spots). Keep those in mind.
- Some people are morning people. Some people are not. Some people need a lot of coffee to function. Those of us who are morning people (Oh, oh! Meeee!) sometimes need to make a little effort to keep our water cooler chatter to a minimum, until your usual work companion is ready for pleasantries. 
- Did you fight traffic on your way in? Me too. Everyday. Glad to hear a little about it, but there is little need to discuss bad traffic every morning adnasum. 
- Having a bad morning? Fight with your significant other? Hungover? Leave it at the door. If you can't,  give a quick "hey guys, I'm going to have a bit of a quiet morning." Your coworkers will understand.
- Altenatively, if you have a normally chatty coworker who is acting a little odd, a quick "Everything okay?" Is more than okay. But please make sure to give them space if they need it. They may not want to share details with you. 
- If you're grabbing coffee, donuts, danishes, whatever for breakfast of a snack - don't be a jerk. Ask if anyone else wants something.

Day-to-day
- Hey guess what? You are at work to work... So I actually recommend doing that for the majority of the time your are in your office, if not the whole time. Coworker interaction is inevitable. Feel free to be friendly or brief - it's about your comfort level. You definitely want to be pleasant, but don't be afraid to end a conversation.
- It's really normal and natural to have a little crush on a client or coworker. DO NOT ACT ON IT. Seriously. It's the best way to ruin your career. 
- If someone (be it coworker or client) is making you uncomfortable, say something to them. Or your manager. Or their manager. Key point: tell someone.
- Are you the one in control of the music at your office? Lucky you. May I advise, play it softly. No one wants to have to yell over your uns-ing house music, nor do the want to have to try to think around it. Keep it PG, keep it quietish, and please don't play the same 5 songs over and over again. 
- If you are sneakily watching videos, don't try to make everyone else watch them. Especially if they are inappropriate. Even if you don't find them inappropriate. 
- Don't whistle or sing along to the music. Zero people want to hear it. Zero.
- Try to keep your bodily activities (post lunch brushing and flossing, nose blowing, etc.) in the restroom. Seriously. Kinda gross. Yes, we all do it. But eugh. 
- Can I second that recommendation of brushing and/or flossing post snack/lunch/whatever?  Especially if you had a fragrant curry or a giant bowl of hummus (I'm certainly guilty of eating both). Regardless of the space you are working in, you probably have another human who has to come near your work space, and people have sensitive noses. You get my gist. 
- Don't mess with the air conditioning. If you are cold and everyone is cold, fix it. But if someone is complaining about being hot and you are freezing, go ahead and bring a sweater or jacket into the office. I recommend a light wool blend.  ... I live in Florida. The coldest it gets here is in August - because everyone's A/C is set to 64 degrees. 
- Keep your eyes on your own work. Unless someone invites you to look or asks you how to do something, consider it Noneya. (As my lovely friend M says, it's Noneya Business).
- If you're going to be on your phone, try to be subtle. No one wants to see their employee blatantly off task. Use the restroom, like everyone else.

End of The Day
- We're all in a rush to get home. It doesn't hurt to chip in and be a team player. But, if someone says no, don't pressure them into letting you help. They might be working on a confidential project or want the extra time at the office.
- If you office is going for a group outing post work unless you are ill or out of the office - you MUST go. It can be a great thing for your career. Though keep in mind, these are coworkers, not your best friends. Keep it appropriate.
- Last, whatever you do, don't cut anyone off in the parking lot. Not cool.

To review: keep it PC, be conscientious to your coworkers, and for the love of all things holy, DON'T whistle. 

Wednesday, July 2, 2014

What's For Dinner: One Pot Turkey & Bean Chili


The name doesn't exactly roll off the tongue, but yum! This recipe has been handed down from my great grandfather (seriously) to my grandmother, who shared it with her daughter-in-law (my mother). The best part about this dish, besides it being really yummy, is that it is incredibly easy to personalize to your flavor palette. My grandmother makes it a hearty beef and tomato chili, my mother a spicy, low sodium turkey chili, and my sister makes it vegan! I personally am a huge fan of beans in my chili, but I also make mine a white chili. 

Technically it's name could be One Pot Three Bean White Turkey Chili. We all know it's an absurd name, so we just call it chili. 

For my One Pot White Chili, here's what you'll need:
1 lb of lean ground turkey
1 medium white onion
3 cloves of garlic 
1 8oz. can of tomato sauce
3 Cans of beans (I like pinto, great white northern, and black)
1 C of chicken stock (Or 1 can of cream of 
chicken soup, if you are feeling naughty)
1/4 tsp of cumin
1/2 tsp paprika
1/4 tsp of red pepper 
1/2 tsp of taco seasoning
Salt & Pepper (to taste)


Dice your onions and garlic and throw them in a big pot over medium-high heat. Once the onion starts to soften (and someone inevitably yells towards the kitchen how good it smells) add your meat and start to cook it. (Your meat can be fresh or frozen. It doesn't matter). 


While cooking your meat, chop it with your spoon into little pieces. Once it's starting to brown a little and look cooked, add your secret ingredient: tomato sauce. I don't know why it works so well, but it does. It adds that certain je ne sais quoi.


Add you chicken stock or cream o' chicken (seriously, just use what you have) and your beans. Canned, fresh, two cans, five cans - at this point it's entirely up to you what you like in your chili. Give your pot a big ole stir.


Now it's time for seasoning! I generally eyeball it, so the measurements at the beginning of the recipe are estimations.  Anyway, add paprika, red pepper, and cumin. Stir it again and see what you think. Then, add some taco seasoning (because yum) and some salt and pepper. Stir it again. Let it simmer on low for about 20 minutes.

That's it. So easy and so good! From my family to yours.


Sunday, June 29, 2014

Hey Guys! Let's Make Cheese!

The Viking and I lurv to go to (and hold) small dinner parties (good food, great friends, and decent wine - is there really anything else as important?) As adults in modern American culture, one always offers to bring a dish or drink, usually I'm bring cupcakes (obvs), but while seeing if I can curb my insatiable sweet tooth, I was perusing the interwebz for something new to make and bring. I have been seeing cheese making kits and "easy" recipes for years, so I figure, why the heck not?

Thanks to my friend and yours, the interwebz, I've found that with 45 minutes and four ingredients (five, if you count water) you can have fresh mozzarella!

Anyway, on to the good stuff! My friends: an introduction to soft cheese making.

Here's what you'll need in your kitchen:
1 Large Stock Pot (should hold over a gallon)
1 Slotted Spoon
1 Digital Thermometer
1 Long Spatula or the like (needs to reach the bottom of your pot)
1 Strainer/Colander
1 Microwave Safe Bowl
Kitchen Rat/Assistant - Optional

Ingredients:
1 1/2 tsp of Citric Acid
1/4 c of Water
1 Gallon of Whole Milk
1/4 tsp of Vegetable Rennet
1 c of Water
1 tsp of salt (rough estimate - salt to taste)

Certainly you can find Citric Acid wherever you can find canning supplies. Rennet is a little more difficult, but is easy enough. A lot of places where you can gets craft beer supplies will carry rennet. If you can find either, live somewhere remote, or just want to do what I did, you can by them here and here.

To begin, measure your citric acid into your stock pot. Add 1/4 c of water to dissolve the acid granules. Then add the milk. Over medium heat, bring your liquid up to 90 degrees. Your milk might start looking slightly curdled. This is totally normal. (You'll want to do this slowly, so you can control the temp. If the mixture gets too hot, the cheese curds will compact, causing you to have firmer, smaller cheese.)

Remove your pot from your heat source. Measure out a cup of water and add the rennet in the same
measuring cup. Then add it to your milky mixture. Stir swiftly for 30 seconds. Slow the motion to a stop with your spoon.

Let the milky mixture sit for five minutes.

You have now created Little Miss Muffett's BFF: Curds and Whey. The curds are the white part and the slightly yellowed water is whey - which is FULL of protein.

Once your five minutes are up, grab your long handed spatula-esk tool. Make a grid of your now slightly solid milky mixture. Return your pot to the heat. Heat the whey up to 115 degrees. Again, slowly to control your temperature.

Once you reach your desired temp, remove your pot from its heat source. Using your slotted spoon, separate your curds into your strainer (which can be placed over your microwave safe bowl).

You now have a HUGE decision to make. Okay, not really huge, but you do have a fun decision. At this point, you can dump your whey and get that giant pot out of your cooking space. OR, you can save your whey and use it for cooking, or baking. I've heard you can use the whey for an additive to baked goods, though I don't currently have a recipe for you, since I am TERRIBLE at yeast cooking. Though I intend to get better at it... and then blog about it.


Back to the Cheese:

Shake your strainer and remove as much excess whey as you can. Dump the whey from your microwave safe bowl. Put the almost cheese into the bowl and heat it on high for one minute in your microwave.

When it comes out it will be super hot, but start to look a little smooth. Dump the whey from the bowl and pick up your almost cheese. Squeeze it and begin to knead it together.

Return the almost cheese into the microwave safe bowl and heat for 30 seconds on high. Once this is done, pull out your cheese and dump your liquid. Add salt. Again, crazy hot (be careful). Fold the almost cheese together a few times. Pinch off some of the soon to be cheese for a taste. Does it need more salt? Add some in!

Throw it back in the microwave for another 30 seconds. Continue to dump the liquid and knead the cheese. It will actually start to take shape like the picture. If your cheese feels a little lumpy, go ahead and microwave it for 30 seconds again. If you cheese feels super smooth and starts to turn itself into a ball, assist it into the shape. Then put it in an ice bath.

Be patient for 10 minutes.

Now, my friend, you have cheese! Dress it with fresh herbs, olive oil, pesto, balsamic glaze, slice it, add it to pizza, or just take giant chunk out. Mostly, enjoy it!


Saturday, June 28, 2014

Dandelion: Greatest Flower Ever

Yeah. I said it. That weed of which people try to rid their yards. The "flower" only appreciated by small children. You may be familiar with some of its work, maybe poking through sidewalks? Yep. That's the one. It's AMAZING.

First, did you know it's leaves make a delightful, bitter salad additive? Schmancy restaurants are starting to feature it. Seriously. 

But we're here to talk about the root. Specifically, the root made into a tea. Have you tried it? I would certainly love to hear your opinions on it. If you haven't, my friend, you are in for a treat. While we all understand the benefits of herbal teas (Sleepy time for anti-stress, what what!), I had not tried dandelion root tea until a few months ago. I had read about some mildly frightening blend of water, tea, and additives that will MAKE YOU SKINNY!!!1!!!1! As we know, I'm a skeptic until I've tried it. And I certainly don't believe in any magic drink, pill, or serum. 

Time and time again, we are shown the only way to lose weight and keep it off it diet and exercise. 

I'm not one for diet or exercise. I try to stay active and not eat cupcakes for every meal. But, all that cupcake eating and cheese making (and obviously eating) can make a gal feel a little gross the next morning. This is where dandelion root tea comes in. 


A cup or two of this magical stuff throughout the day (the box suggests one bag per cup, but to three times a day) and the next morning... Less bloat. Dandelion root apparently helps rid your body of excess water weight. 

This tea isn't going to make your fairy godmother appear out of this air, but it will certainly help you feel better tomorrow (and so will a few veggies).


Thursday, June 26, 2014

Spaaaaaaanx And Other Shapewear

No, but seriously. Spanx. Or really any shapewear for that matter. I support it. 

A few months ago, my sweet, little grandma and I went shopping for some party dresses. Some of you may know, even though I've clearly not a dedicated blogger (full time job, family, social life, experimental cooking - stuff gets in my way) that the Viking & I opted to no longer "live in sin". But that's another story, for another time. Today, we're discussing shopping with Grandma!

My grandma had mentioned to me that she wanted to go shopping for something to wear for my wedding and the surrounding festivities (Mmm hmm, festivities, again, another story). So, my grandma, like any living, breathing woman on earth wants to feel great, but has parts of her body she doesn't feel great about. (Good to know that doesn't change, even when you're an 85 year-old Grandma? Nope. Not good.) She and I have been having discussions about healthy eating (lean protein & green veggies!) and positive body image, etc. 

The thing that was really getting her down was that, not only does she not care for the current trends (mind you, my grandma is sassy - red nails, sporty little outfits, and always a nice blazer when going out to eat) but they stuff she does like, is not made for someone with her body type. She is the very definition of petite, with her spiked hair she might juuuuust graze 5 feet. After moving to Florida when I was a kid, she did a radical transformation and lost a ton of weight. Obviously you can see where I'm going with this. When you lose weight, there is always excess skin. And at eighty-something, stuff just doesn't quite sit where it used to. 

Our discussion from food and body image took a path to discussing clothing choices - personally, the older I get, the more traditional my taste gets. Don't get my wrong, I lurv an avant garde statement necklace... But give me a pair of cropped skinnies and some ballet flats, and I feel like Ms. Audrey. 

For grandma, we decided an A line with an empasisized natural waist was the way to go. That way, she could still feel like she was keeping up with the times, but still keep a shape she was used I, but more importantly, was most flattering on her. Everything we picked out, fit into those strict guidelines. As she tried things on, dresses were good - but I knew they could look better. 

Then came the discussion of shapewear. Now, I realize that most people only wear them for special occations - and unless you are a movie star, you don't always have those occations. 

Did you know that in the 1950's, everyone wore shapewear, even men? How else do you think Dior made such gorgeous flower inspired dresses with such tiny waists? (It surely wasn't their diet - sugar was being advertised as a health food!)

Now, I'm happy to write a little disclaimer that having to fit into societies' perceived, yet near unobtainable attractiveness norms for our body shapes and sizes is sexist, chauvinistic bullshit - because it is. Unfortunately, I A) really love how a frilly tutu party press makes me feel inside (like a 4 year old with a spinning dress) and B) Have a job where I have to look professional and see other people - so I can't wear shapeless frocks the color of oatmeal (I mean, I could, but they don't elicit the same spinning response.)

Whew. That was nagging me a little bit. 

The next step in my adventure with Grandma was to approach the topic of shapewear. Was she interested, has she tried it, would she what it? Thankfully, one of the lovely associates in the department store we were patronizing brought us a pair of Spanx to try. 

We wiggled her into those things, little by little. We then picked a wrap dress for her to try. She looked at the mirror and barely even recognized herself. Her posture was improved (her head easily reached the 5 foot mark this time!), the dress skimmed her body, and most importantly, she was comfortable! She told me she felt like she could do anything. It's pretty magical when a woman you love so dearly, who hasn't been feeling that great about herself lately has that ah-ha moment.


Grandma got three new dresses that day. And a body shaper. It was a complete success. 

Now she wants a leather jacket to go with her wrap dress...